
Blackboard for Faculty
These instructions explain how to use the Blackboard Ultra Content Editor to create accessible content that meets digital accessibility best practices and supports all learners, including those using assistive technologies.
Accessing the Content Editor
- Open your course in Blackboard Ultra.
- Navigate to the area where you want to add content (Document, Announcement, Assignment instructions, Test question, or Discussion).
- Select Add Content or click inside an existing item to open the Content Editor.
Use Headings for Structure
Headings create a clear content structure, improve readability, and allow screen reader users to navigate content efficiently.
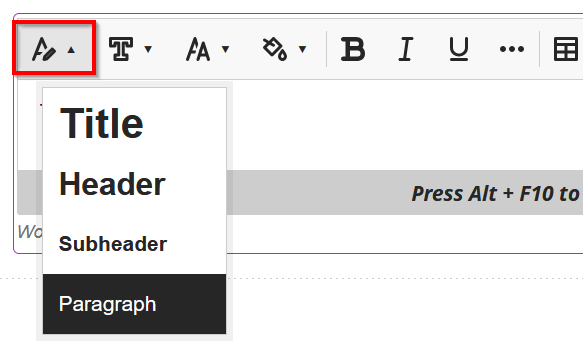
How to apply headings:
- Select the text you want to format.
- Choose the Styles drop-down in the editor toolbar.
- Select the appropriate heading level:
- Heading 1 – Page or document title (use only once)
- Heading 2 – Main sections
- Heading 3 – Subsections
Best practices:
- Do not skip heading levels (e.g., Heading 2 directly to Heading 4).
- Do not use bold text alone to represent headings.
Use Lists Correctly
Properly formatted lists help screen readers identify related items.
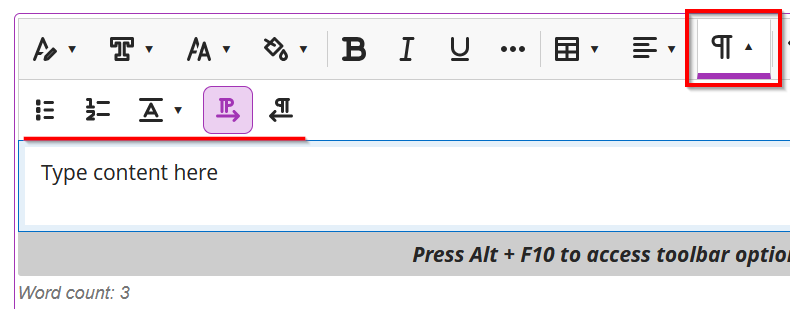
How to create lists:
- Use the Bulleted List or Numbered List icons in the toolbar.
- Avoid typing hyphens or numbers manually.
Write Meaningful Link Text
Links should clearly describe their destination without relying on surrounding context.

Accessible examples:
- Cameron University Home Page
- Cameron University Course Schedule
- Blackboard Ultra Instructor Guide
Inaccessible examples:
- Vague or context‑less links
- Click here
- Read more
- More Info
- Links that rely only on visual cues
- See the blue button
- Click the icon on the right
- Press the arrow below
- URLs used as link text
How to insert a link:
- Highlight the descriptive text.
- Select the Link icon.
- Paste the URL and save.
Add Alternative Text to Images
Alternative (alt) text allows screen reader users to understand the purpose of images.

How to add alt text:
- Insert an image using the Image icon.
- Select the image.
- Enter a concise description in the Alternative Text field.
Guidelines:
- Describe the purpose of the image, not just its appearance.
- Mark purely decorative images as decorative so they are ignored by screen readers.
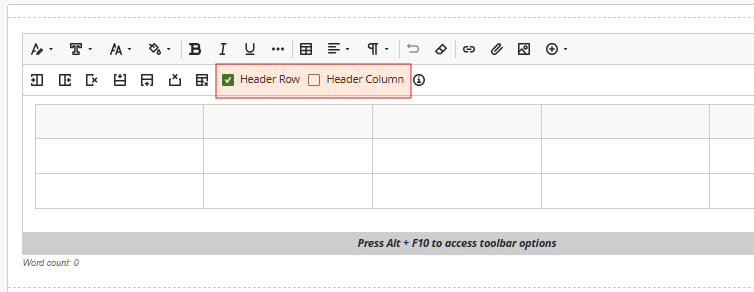
Use Tables for Data Only
Tables should be used only for presenting data—not for layout.
How to create an accessible table:
- Select the Table icon.
- Insert the required rows and columns.
- Designate the first row as Header Row.
Best practices:
- Keep table simple
- Avoid merged or nested cells.
- Avoid complex, multi-level headers whenever possible.
Ensure Sufficient Color Contrast
Color should never be the only way information is conveyed.
Best practices:
- Use high-contrast text and backgrounds.
- Pair color with text labels or symbols (for example, use the word “Required” instead of relying on red text alone).
Avoid Excessive Formatting
Overuse of fonts, colors, or alignment can reduce accessibility.
Recommendations:
- Use default fonts.
- Left-align text.
- Avoid underlining text unless it is a hyperlink.
Check Accessibility Before Posting
Before making content available:
- Review headings, lists, links, and images.
- Ensure instructions are clear and concise.
- Preview content using Student Preview to verify readability.
Ultra-Accessibility Checker (Powered by Ally)
Accessible content promotes inclusivity and meaningful engagement for all learners. Blackboard Ultra includes the Ultra Accessibility Checker (powered by Ally) to help you identify and fix accessibility issues.
The Ultra Accessibility Checker scans content created in the Rich Content Editor and:
- Identifies potential accessibility issues
- Explains why each issue matters
- Provides guided, quick-fix options to help you resolve issues efficiently
Using this tool makes it easier to ensure your content is accessible to everyone.
More on Ultra Accessibility Checker (Powered by Ally)
Additional Resources
Ultra-Documents – Learn more about how to create dynamic Ultra documents with a mixture of text, attachments, and multimedia.