
ACCESSIBLE PDF DOCUMENTS
Adobe Acrobat Pro is a useful tool when creating and/or checking accessible documents. If you do not have Adobe Acrobat Pro on your work PC, please email the Helpdesk to request the installation of the program.
Check Existing Documents for Accessibility
1. Open the document with Adobe Acrobat Pro
2. Click > All Tools > View More> Prepare for Accessibility
3. Click "Check for Accessibility"
4. This will open the Accessibility Checker Options Menu. Leave the default settings as is. For reference, see the screen shot below:
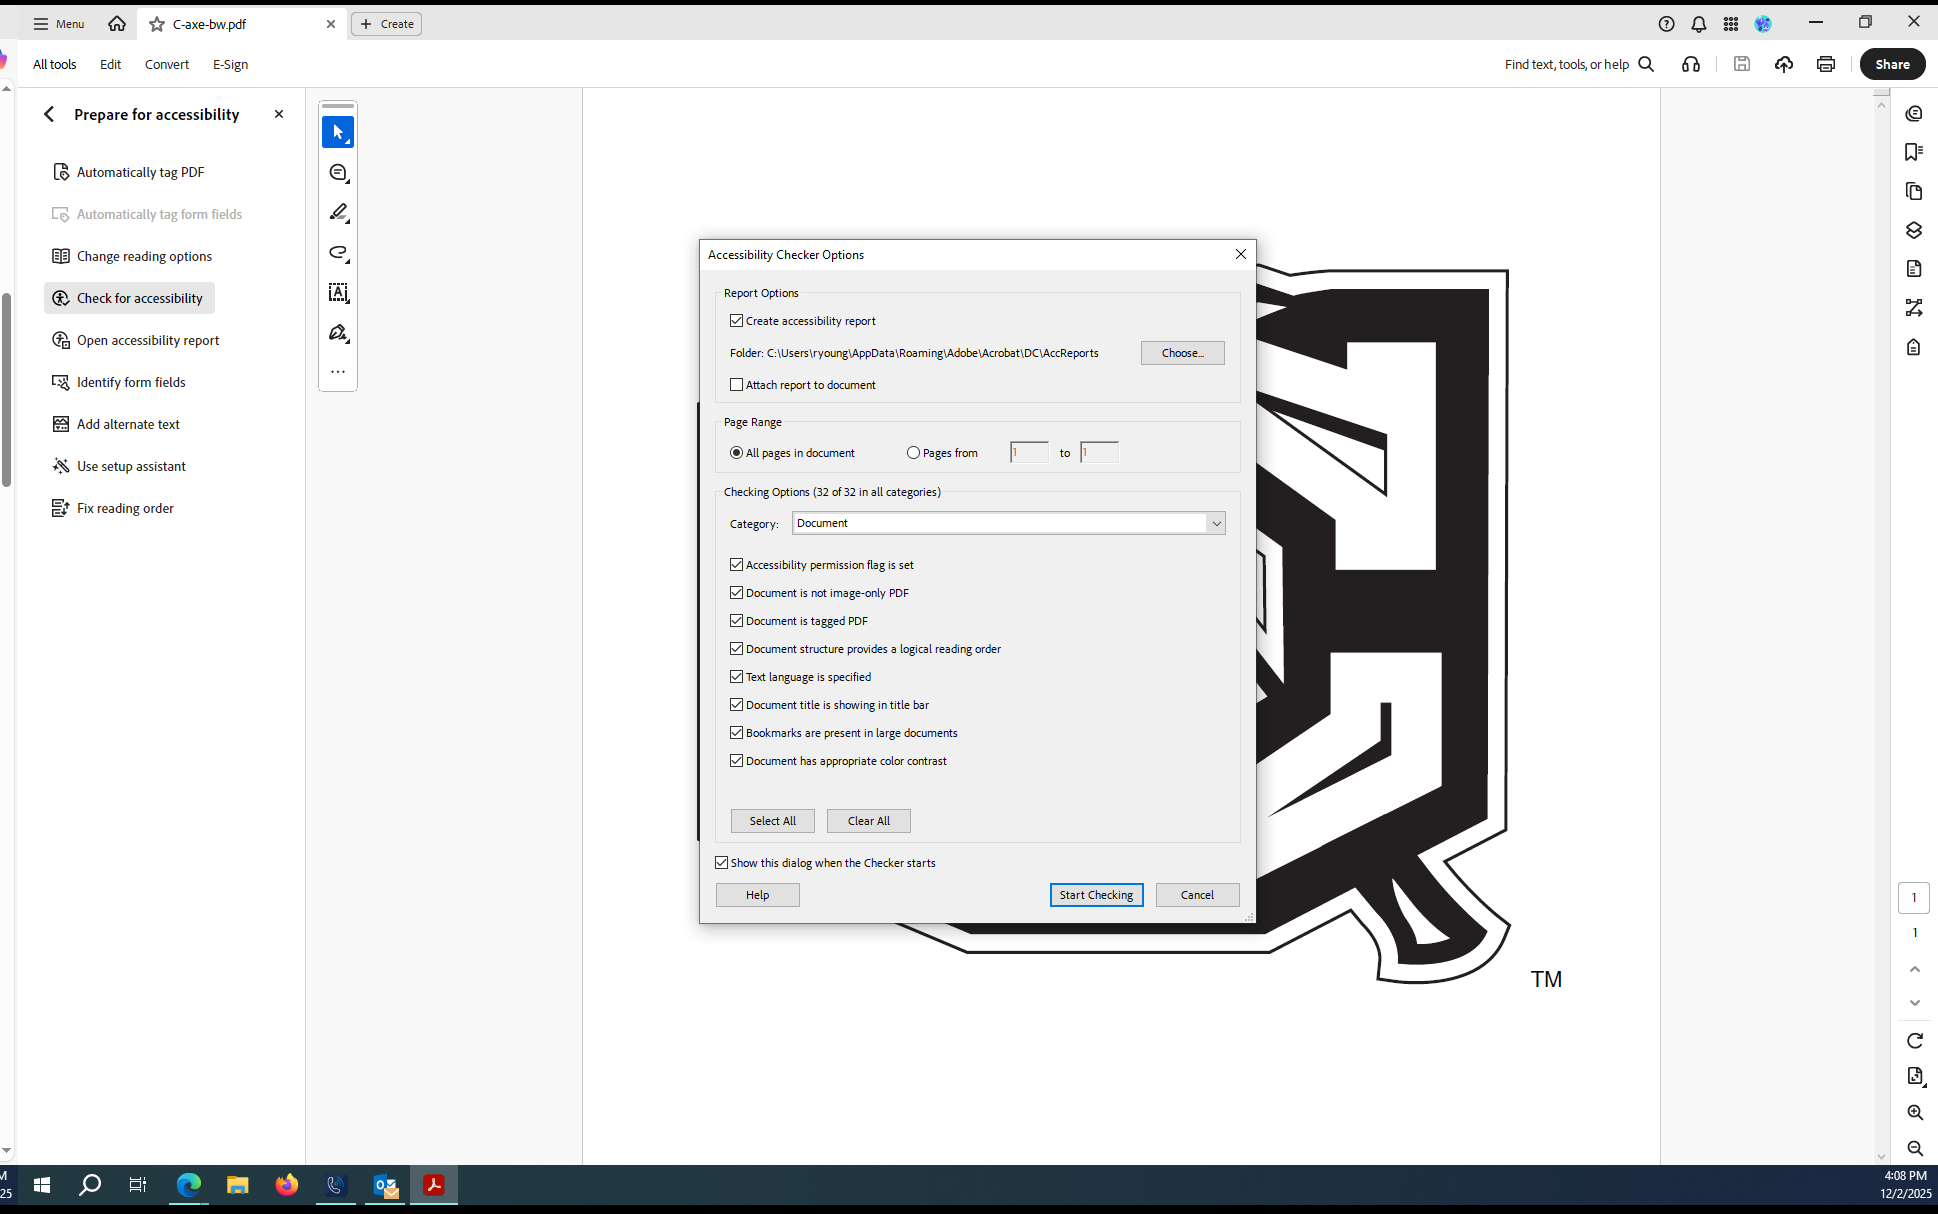
5. Click "Start Checking"
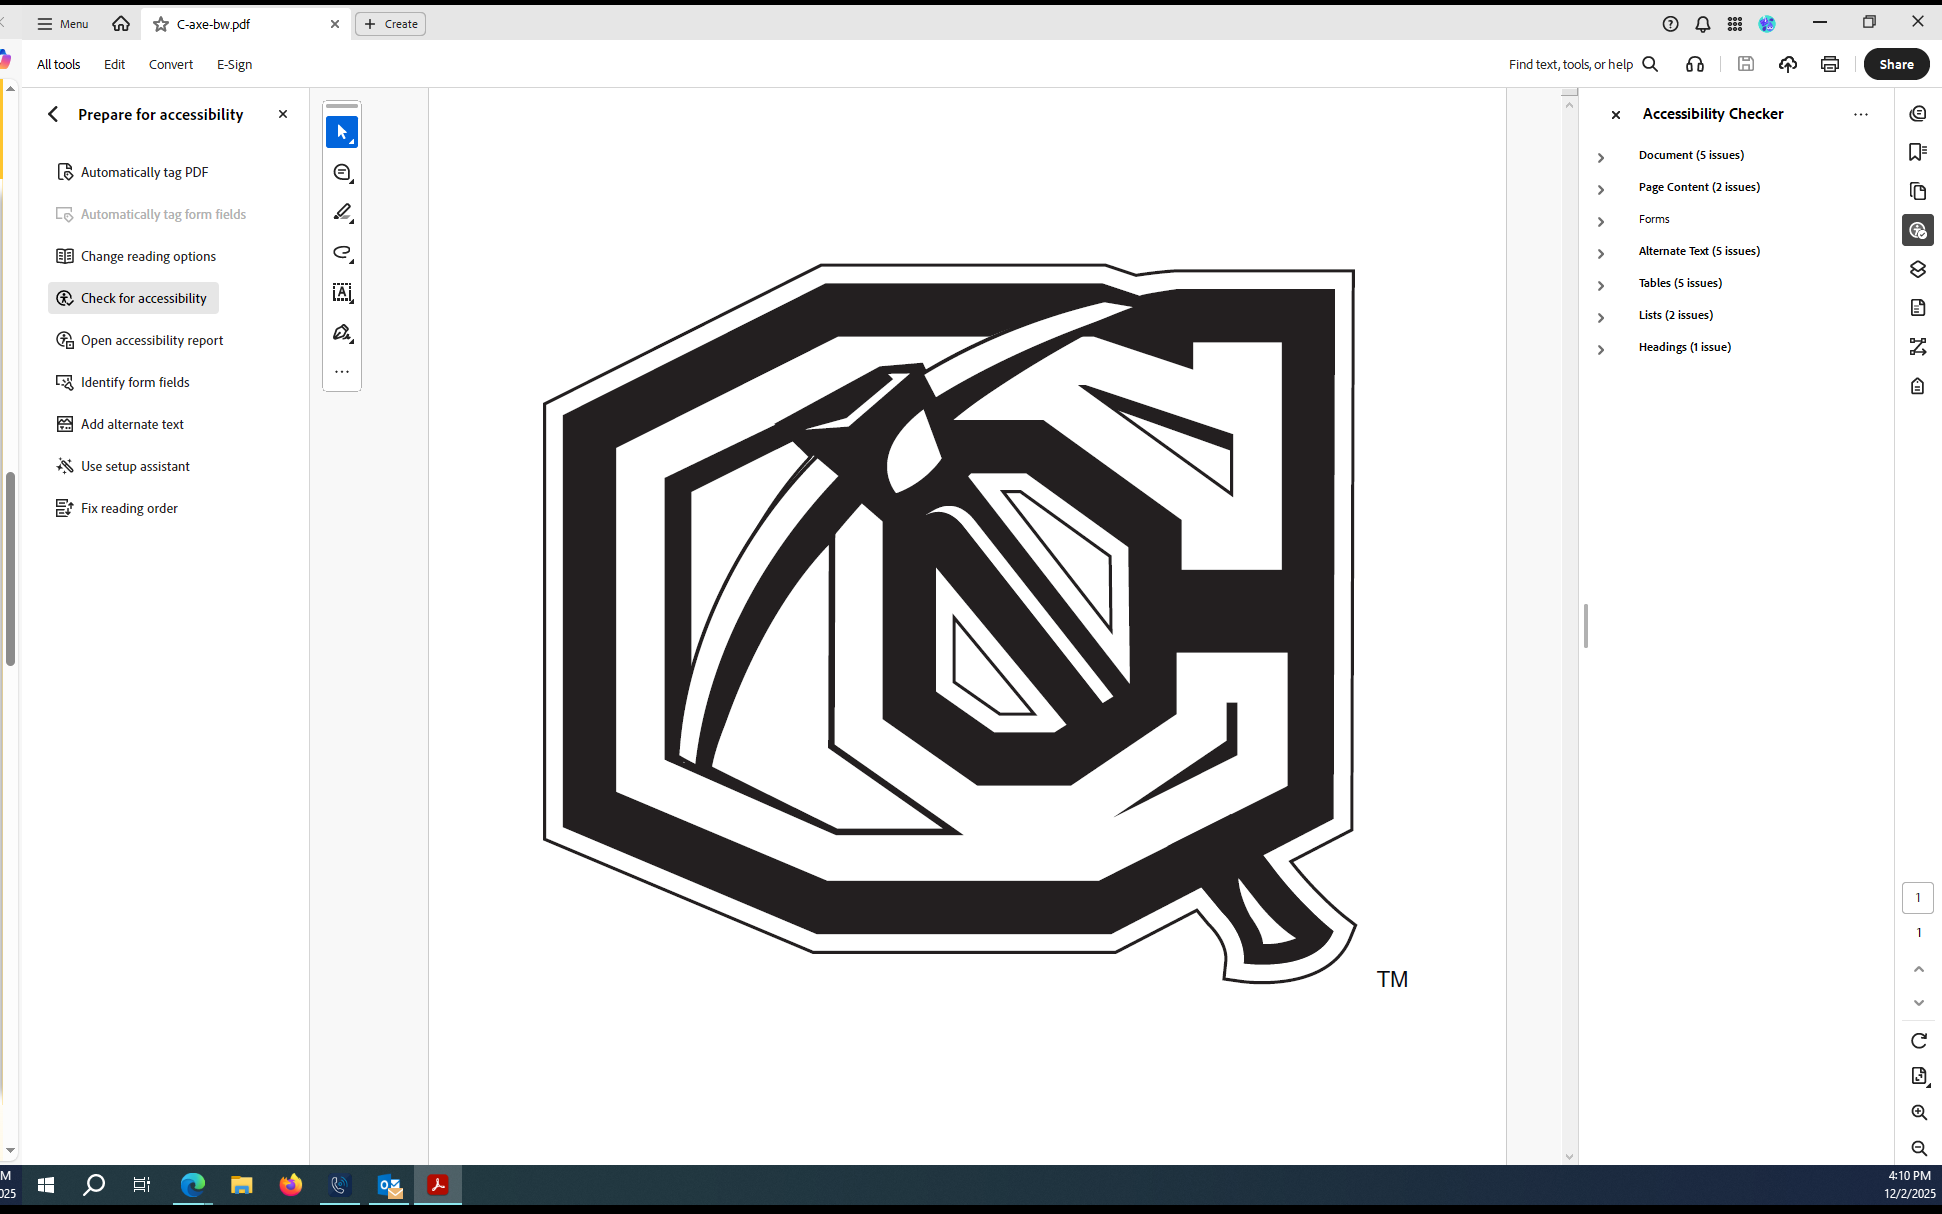
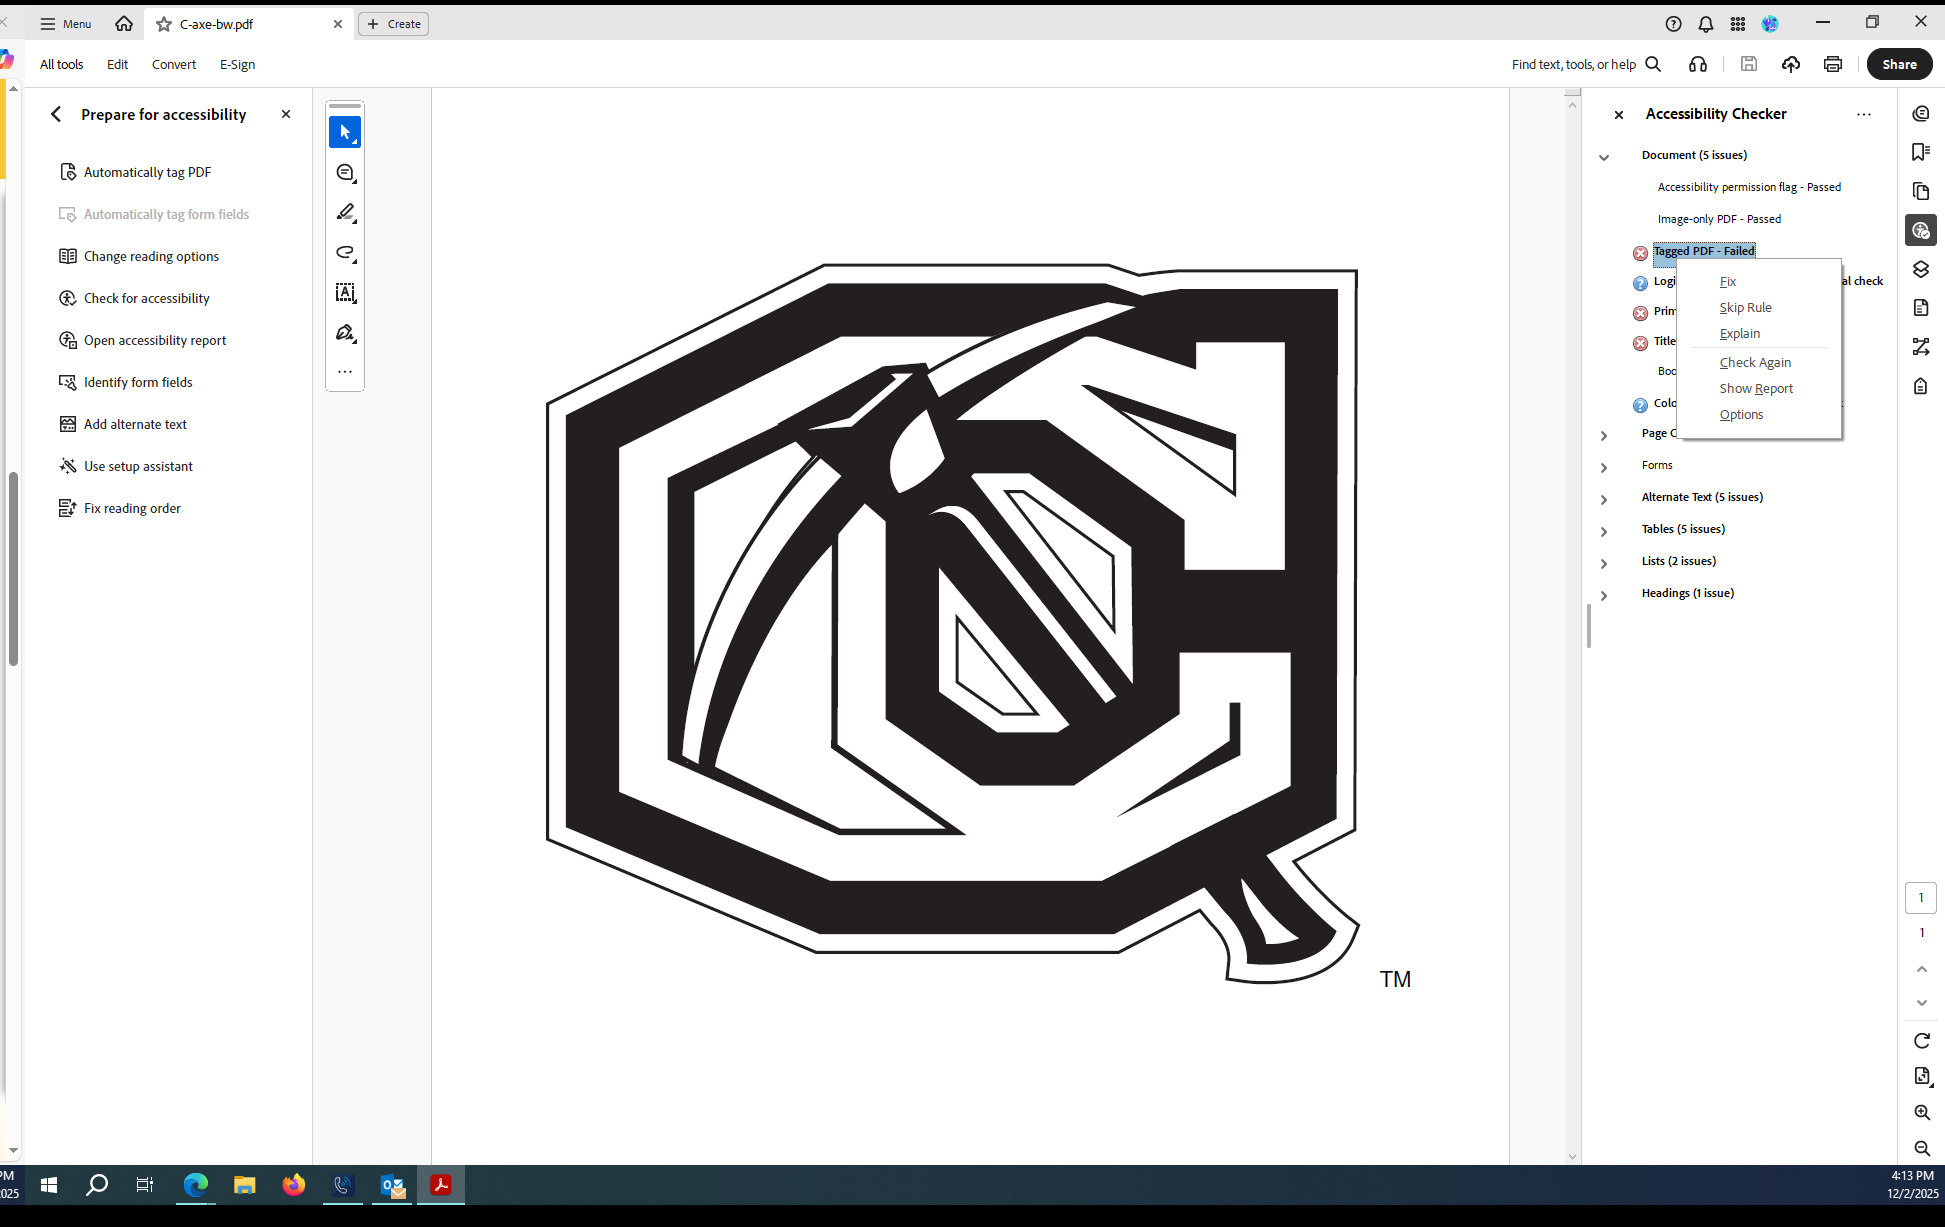
6. You will see the Accessibility Checker results listed in a menu on the right side. To fix an error, open the error by clicking the right arrow > next to the error, then right-click the listed error. Click "Fix" to have Adobe fix the error (not all errors have this option). To understand the error, click "Explain." When Explain is selected, Adobe Acrobat Pro will open the Adobe Help Hub which provides instructions with how to fix an error. See the two screenshots below:
7. All documents will have two errors under "Document": Logical Reading Order - Needs Manual Check" and Color Contrast - Needs Manual Check" that you will need to manually fix/check. Three free color contrast checkers are WebAIM Contrast Checker, TPGi Colour Contrast Analyser from Vispero (requires a download on your computer), and Deque University Color Contrast Analyzer.
8. To fix and/or check the reading order, click the "Z" shaped icon on the right-side menu and also select "Fix Reading Order" in the left-side menu. This pulls up the Reading Order menu dialog box.

9. Once clicked, the program will number each element within your document. The numerical order is an indication of the order a document will be read using a mobile device. Double check sequential order.
10. If the numerical order is incorrect, click and hold the number located in the Order Panel, and drag to the correct location. Acrobat Pro will then re-number all elements of the document.
11. To hear how a screen reader would read your document to a user, you can click the icon that looks like a set of headphones located in the top right corner next to the search bar.
12. Next - Tag Structure. This is the most important element to check when making an accessible document. The document tags are what screen readers use to read a document in addition to the logical reading order. To check the Tag Structure, click the tag icon.
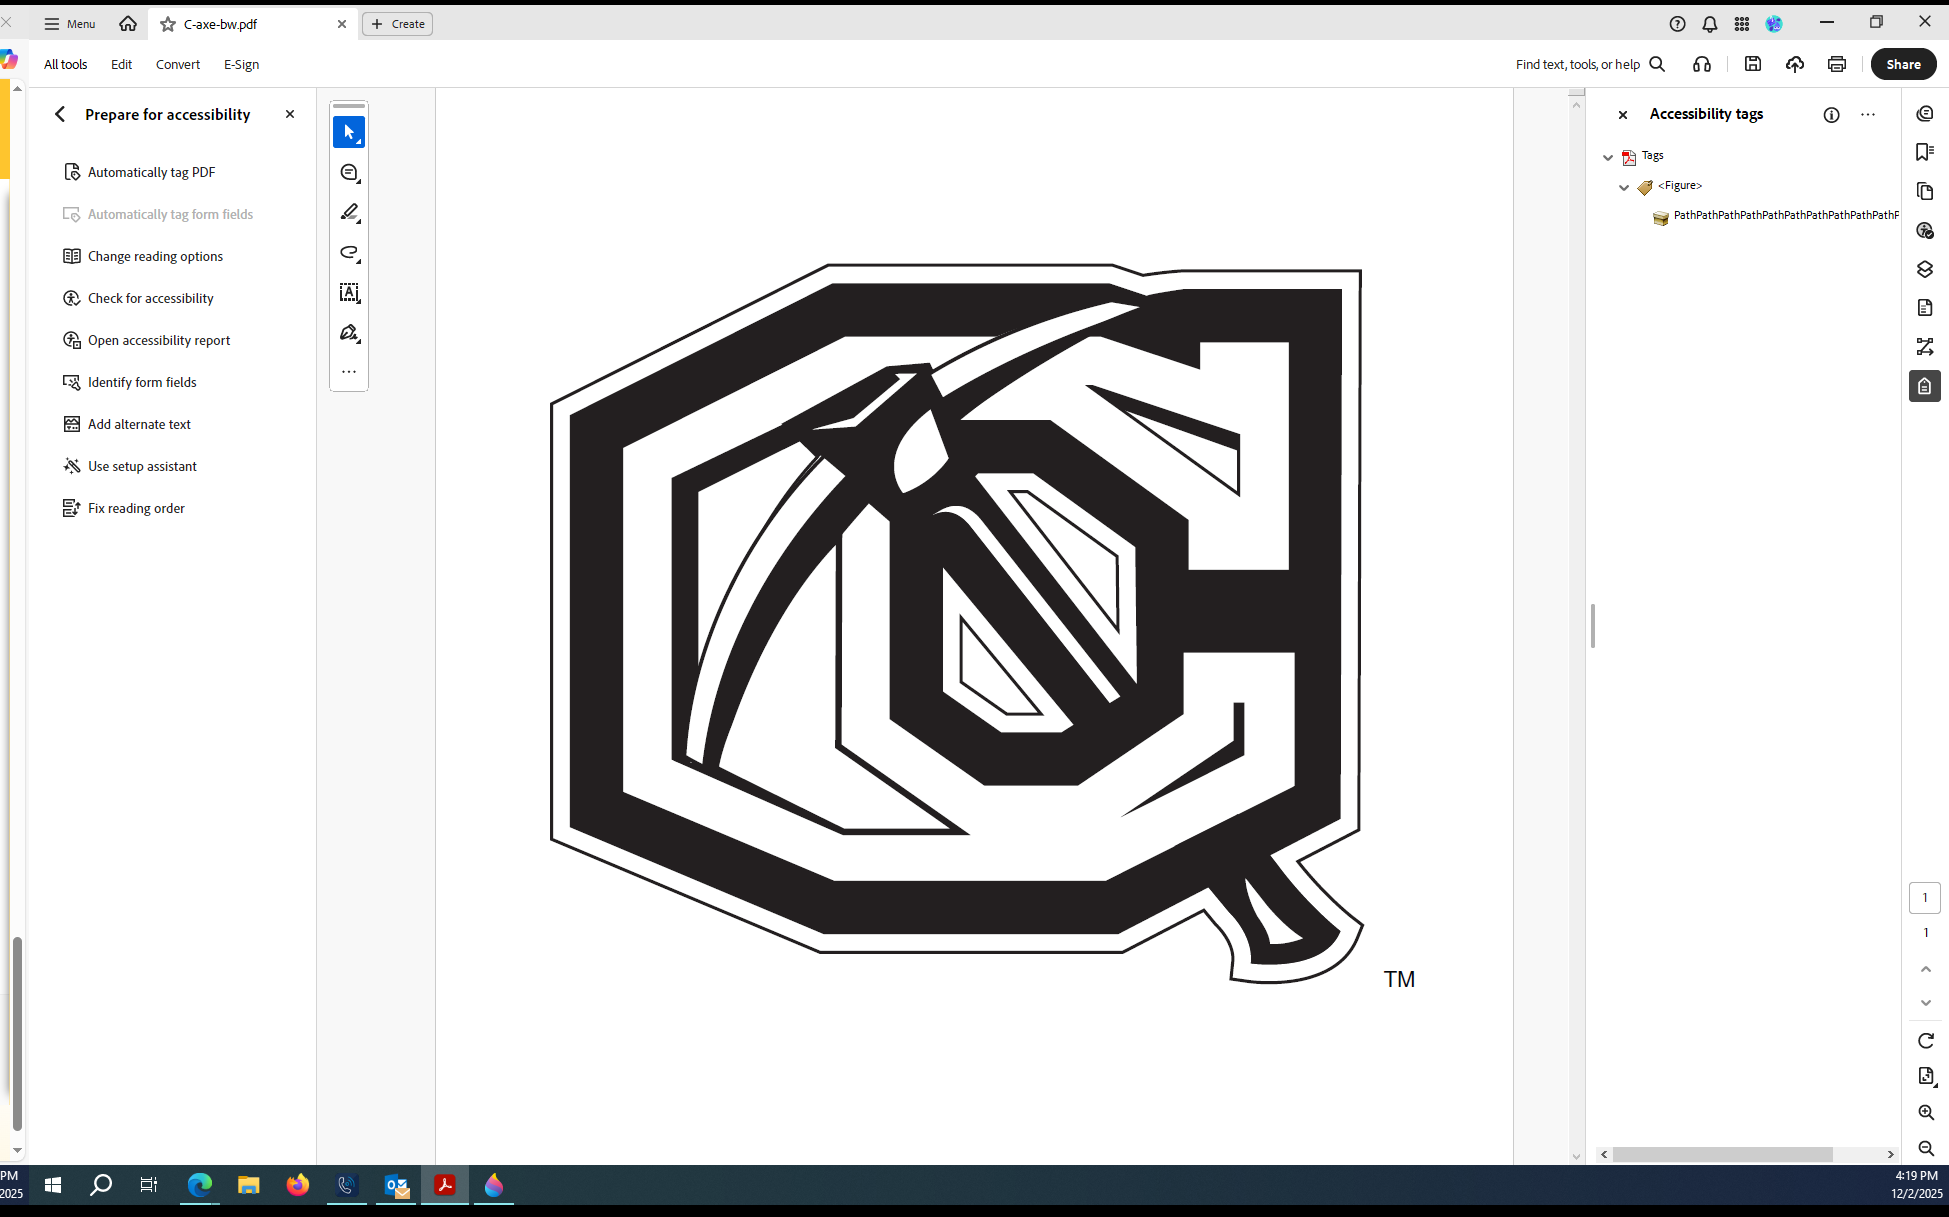
13. Check the order of the tags by single clicking each tag in the list. When a tag is clicked, that piece of the document will be highlighted.
14. If a tag is in the incorrect order, single click and drag that tag into the desired location.
15. Headings of documents should be labeled using a H1 tag.
16. Regular text of the documents should be labeled using the Paragraph tag.
17. Always run a full accessibility check after making changes.
18. When you have fixed the accessibility errors, save the PDF. Menu > Save As